Monday, May 30, 2011

Singer Vintage Buttonhole attachment, with video!

One of my favorite things about the Singer slant needle sewing machine that I use is the buttonhole attachment.  The buttonholes are strong, always look exactly the same and it can be used on almost any fabric.  In my last post I mentioned using the buttonhole attachment and Robin of a little sewing mentioned she would like to hear more about it.  Since I have many projects in the works but nothing finished and blog-worthy right now, here is a post about buttonholes.  I think that like zippers, buttonholes can strike fear into the heart of the beginning sewer, but they are not bad at all once you get the hang of it.  In fact, this attachment does all the work, so really the only part of the process that the sewer is responsible for is the buttonhole spacing, marking the garment and then placing the needle in just the right spot to start the buttonhole.


Singer buttonhole attachment with templates
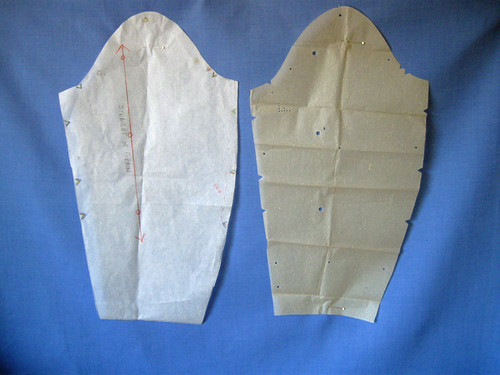
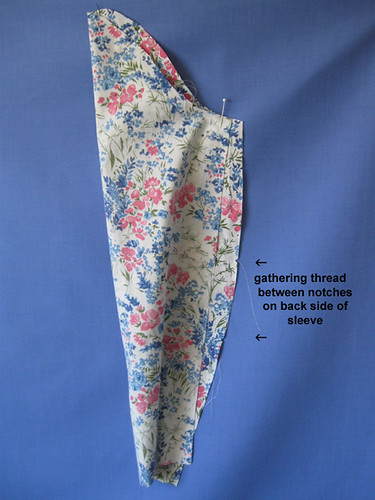
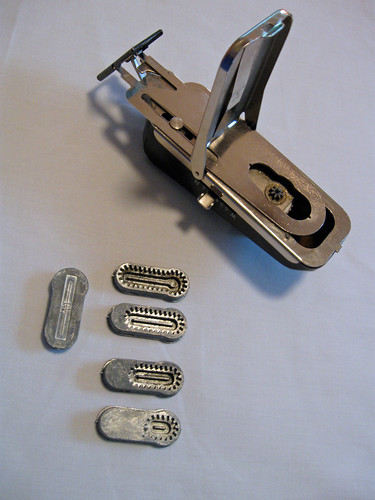
To get started, you need to choose the template based on the size of the button.  The Singer attachment has 5 templates, but I only ever use 4 of them.  Once in a great while I use the keyhole template, if I make a wool jacket that seems to call for that style, but otherwise I use the straight one for large buttons.  Then the other sizes are good for coats, dresses and blouses.  The tiny one is cute but very small - maybe for children's or doll's clothes.  
The attachment is flipped over on its back, with the door open, so you can see where you drop in the template and the teeth of the buttonholer grab onto the template.


Here is the first page from the manual, the parts labeled with their technical names such as "bight adjuster" and "feed cover plate" 
Buttonhole attachment manual page 1


Back to the sewing machine.  You remove the regular sewing foot, and the screw that holds it on.  The buttonholer has its own screw, slightly different, used to attach it.  The Feed Cover Plate has to be attached to the surface of the sewing machine,  the screwdriver is pointing to the screw hole that is the correct one to use.  I have mindlessly screwed it into the wrong one and then wondered what was wrong after I attached the buttonholer, so attention here.
Button hole attachment on machine


Buttonhole attachment plate placement


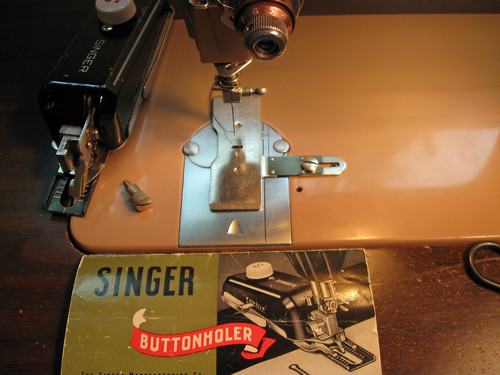
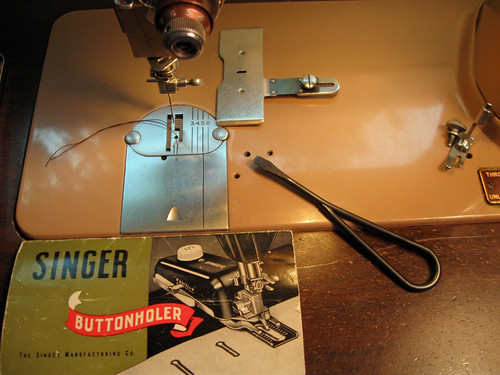
A little fiddling with the cover plate is important, as the needle must go through the very small hole and if it is off center it will hit the cover plate and break the needle, so check before proceeding. Button attachment plate


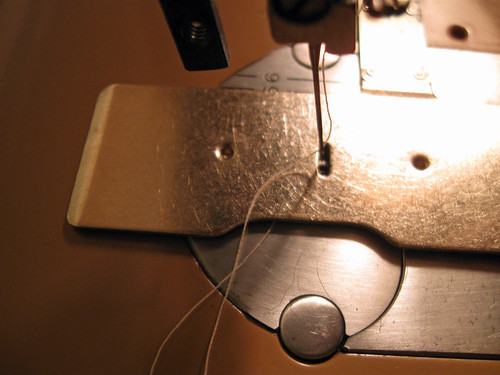
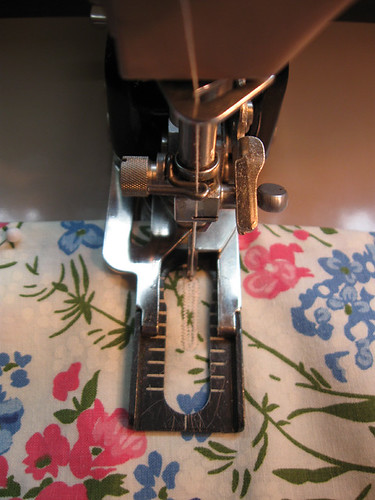
Here is a short (1 minute) video of the buttonhole attachment in action.  It is a bit blurry - my first time trying to video and sew.  Mostly I wanted to show the action of the attachment and how fast it is.


Wasn't that exciting ? OK, maybe not so much but imagine making a garment with 8 buttonholes, plenty of time for daydreaming or pattern planning while hypnotically watching that little gizmo go round and round.
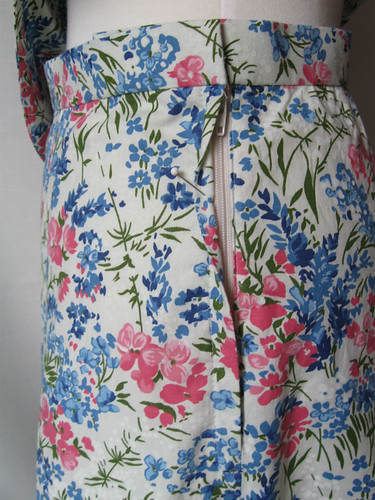
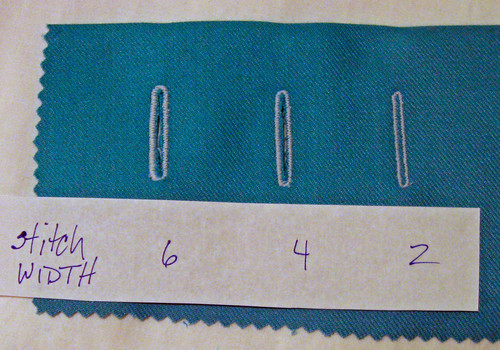
Samples of the different buttonholes, made on a scrap of wool with no interfacing. I went around 2 times for each buttonhole. 
Button size sample
You can also change the width of the stitch, rather like adjusting a zig-zag stitch.  They call it "bight adjustment" in the instructions.  Here is a sample using the different widths.  This is useful depending on the type of fabric and size of buttonhole selected. I usually make a few test buttonholes on scraps to choose the right combination of size and stitch width.  

Button stitch width sample
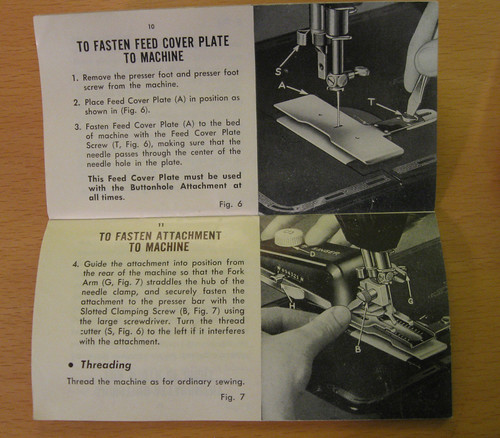
The manual shows the attachment in place much better than photos I took so here is a look at that.  I have learned to use all the Singer attachments from the manuals that came with them, they are incredibly detailed and yet easy to understand.  Perhaps because I am an instruction reader - computers, power tools, tv and cable, photoshop, whatever it is I read the instructions before proceeding.  If that isn't enough,  I take after my dear old dad, go to the library and get a book, try to teach myself whatever is needed.  So I strongly recommend these little instruction books that come with the Singer accessories.  If anyone has an attachment but no instructions, I would be happy to photograph the rest of the pages and post it on my Flickr page. 

Button attachment instruction manual

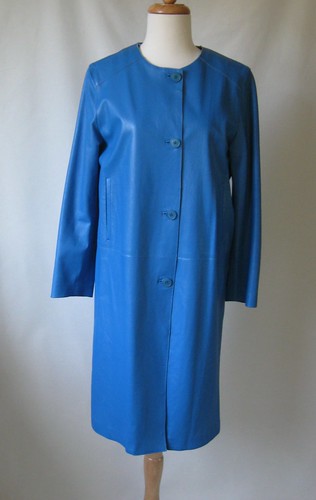
Had enough about buttonholes?  I was sorting through some past photos and saw that I took a whole series of pics while I was making my winter coat, so maybe a post on my methods for bound buttonholes.  Also regarding these machine worked buttonholes, there are a few tips which occur to me and I have not mentioned here, so I will do another short post on those later this week.  
Red salvia closeup
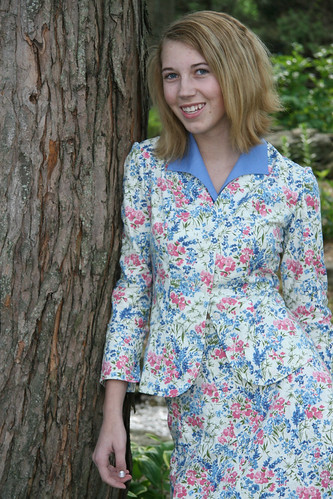
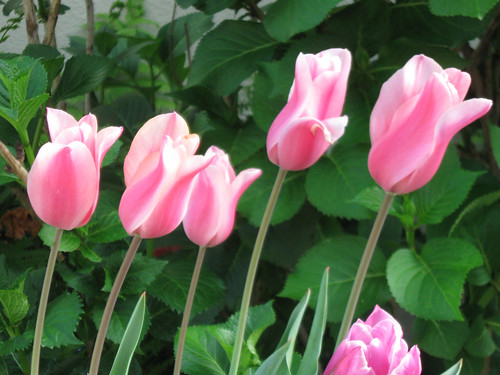
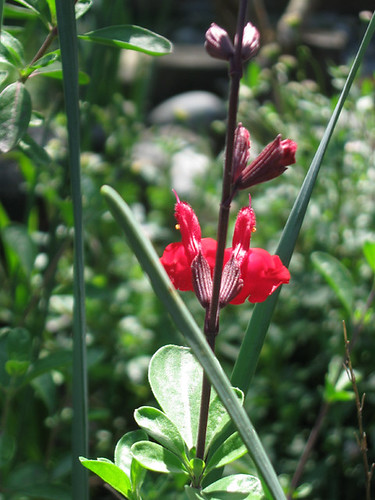
Today I really should get outside and plant the new stuff I purchased this weekend.  Despite our weird late May rain here in N. California, I am trying to change a lot of my garden to low water usage plants.  So here is one of them, a red salvia that the hummingbirds love.                                              


Thursday, May 19, 2011

Officially a Fan of Vintage, Project Done and photos taken

The title says it all, I am a fan of vintage patterns.  I have always been crazy for a few specific categories within the vintage fashion world.  I love the tailored suits of the 40's, the voluminous party dresses of the 50's, and the fantastic A-line dresses of the 60's and 70's.  My vintage pattern purchases fall into these categories, and while I have tackled a few, the almost excessive fabric requirements of the full skirted 50's dresses are the reason for hesitation. However I have almost convinced a friend of mine that she needs the 50's dress from a fantastic vintage pattern I have - so let's hope that one makes an appearance.


Here are links to the posts that preceded this one,  Part 1 (with pattern envelope photo) and Part 2 for this project.  


As for the 40's suit, here is the finished version.  Modeled by the adorable Nancy, who came to my Etsy shop after reading a post on my blog.   I am so happy to see how this looks on her, plus her choice of setting and pose are just lovely.  
Nancy 1
Nancy2


Here is a better look at the jacket.  This pattern has several options, so I made the collar which is not attached.  It has 2 buttons in front, like the top of a blouse, and lays just right under the upper edge of the jacket. So a different blouse could be worn, or maybe a sweater or T underneath, or wear the jacket as a top.  


It is so much fun for me to see her in the outfit.  When we first e-mailed, I said I would love to write about it on my blog - but her great photos exceeded my expectations.


I did take some photos on the dress form, and made one change in the pattern design.  The pattern had a shoulder dart pointing to the bust, and then a waist dart, but between the darts the top had an odd shape, so I decided to connect the two darts and create a shoulder princess seam to smooth out the shape over the bust.

Vintage 2piece top close
Here are a couple of the finishing details.  I did a lapped zipper in the skirt, and used my trusty Singer attachment for the buttonholes.  I have never made a stitched buttonhole with any other method, but I can't imagine a better one, maybe I will do a post on this gizmo next time I use it.


Vintage 2piece zipper
Buttonhole on N outfit


So vintage - I am officially hooked on these patterns.  Although for the record I would never give up the modern multi-size pattern, a great timesaver and perfect for a someone like me who is definitely not same size all over (at least according to the dictates of the big 4 pattern companies).


Thanks again to Nancy for initiating this project and sending her great pictures.
Happy sewing, be it vintage or modern,   Beth


Sunday, May 15, 2011

Officially a Fan of Vintage, part 2

When I first started sewing I would often cut corners with the construction details, and my finished garments probably showed it.  And yet I proudly wore these self-made stylings to school -  junior high school ! - oh, the horror. Sometimes I wish I could go back in time to prevent myself from wearing that wool vest with the mismatched plaids or the dress with the wonky zipper - but as my mother the retired teacher says "everything is a learning experience"
Thankfully I did learn a bit, and by sophmore year of high school was turning out all manner of prom dresses.  I think senior year I made a Vogue designer pattern in two tones of green, an avant-garde style that probably wasn't really suited for a prom but might have looked right at a museum fund raiser.  
So when I cut out the sleeves on this 2-piece vintage outfit it reminded me of this detail that is an important construction element I used to ignore.  
Here is a look at the sleeve pattern piece.  On the right is the original, and the left is my tissue paper tracing.  I like to copy all the pattern pieces on these vintage patterns, they often are very fragile and these very old ones have no printed markings, a fact that really threw me the first time I opened one up.  It took me a while to figure out that the 3 big holes marked the straight of grain line on the pattern pieces.
vintage 2piece sleeve pattern


See how the notches in the center of each side seam have different spacing.  The back part of the sleeve is meant to be eased into the seam to create a curve and a bit of ease where the elbow bends.  You know it is the back of the sleeve, because in the sleeve cap there is a double notch on the back of the sleeve.  I like how sewing has these conventions that remain the same across decades and different pattern companies.  If you have a double notch in the sleeve cap - that is the back of the sleeve.  A reassuring feature and very useful.  For some reason I have made more dumb mistakes on sleeve insertion that any other part of a garment. Such as the ever popular attaching sleeve backwards, or sewing 2 left sleeves.  I could go on.


Here is the sleeve as cut out.  The front seam length is visibly shorter than the back seam
Vintage for N sleeve2
and needs that little bit of gathering to make it the same length as the front.  In those early years, I used to just sew it up and slice off the extra bit at the bottom.  Perhaps I ended up walking around with my arms stiffly held at my side like Frankenstein - can't recall or supressed those memories.


On the right is the sleeve with the seam sewn.  
Vintage for N sleeve3


The slight curve of the sleeve is now visible, and there is room in the elbow for movement.  


For the bottom of the sleeve, I made what I consider a "faux cuff"  not really an attached sleeve cuff, but a way to turn up the bottom of the sleeve into a cuff.  This sleeve is very narrow at the bottom, so I left the seam open at the bottom about 4 inches.  I cut a copy of the sleeve using the bottom about 8 inches or so and sewed it on as a facing.  That way there is a small opening, about 3 inches and the end of the sleeve can be turned up like a cuff, with the right side of the fabric showing.  It doesn't really have the opening at the outside as it would on a real cuff, but it gives the look of a cuff or turned back sleeve and finished off the hem nicely.


Vintage 2-piece sleeve cuff
Here is a small peek on the dress form.  Next post - finished garment and photos of Nancy wearing her outfit.   
Vintage 2piece top close

Today's SunnyGal garden photo, in keeping with my pink and blue theme, I noticed a lot of activity in a pink climbing rose bush (Cecile Brunner rose) which grows between the orange and lemon trees.   When the light was just right I happened to glance over and realized there is a very big nest there with a patiently waiting blue jay, and her frequently visiting mate.  I was picking the oranges and lemons yesterday and she did not budge.  This photo makes me think of Robert De Niro  (for you film buffs out there), and yes, I am looking at you.  Hope to see some baby birds soon.

Bluejay in pink rose

Wednesday, May 11, 2011

Officially a Fan of Vintage

Officially a fan of vintage. . .that was my comment after finishing a very special project.  I have been looking forward to doing this post for a few weeks and now I have all the photos ready. Here is a little peek.


Vinrage for Nancy1


Vintage dress front full1


I was contacted via my Etsy shop by Nancy, a blog reader who read my post about the Vintage Treasure dress, which is pictured at right. 

This dress and the posts about it have generated more comments than anything I have done so far on the blog,  my conclusion being that sewing clothes is such a personal activity, and something done by so many generations that we all relate to sewers from prior eras.  I think we can imagine their struggles, perhaps during wartime when cloth was in short supply or know what it was like to make a dress for a very special occasion, associate it with happy memories and then possibly hand it down to someone else in the family.


Nancy asked if I would sew an outfit from a vintage pattern for her.  The most interesting part to me is that she is in high school - so there are fans of vintage at all ages!  I was intrigued and consequently I may do more of these in the future.  


Here is the pattern that she chose.  I reminds me of an outfit worn in old black and white movies of the 40's with snappy dialogue, missed connections and switched identities that get resolved in the end with smiles and a song.
Vintage pattern for N
She chose the fabric pictured in the first photo, floral for the top and skirt, and the solid blue for the detachable collar.  Yes this pattern is a tiny size - I had to do some adjustments, but not much for this slender 16 year old.  The fabric came from one of my estate sale finds, I can't recall which one but I think the same where I found the red and white dress. 

This is the first time I have used an Advance sewing pattern.  Looking at the Vintage Pattern wiki I find that Advance sewing patterns were sold exclusively at J.C. Penney department stores from 1933 to 1966.  Of course in those days department stores actually had many departments, and you could get things like fabric and patterns as well as clothes.   I recall going with my grandmother to the flagship store of the Emporium, on Market St. in downtown San Francisco where she worked in accounting and thus had the wonderful employee discount.  The Emporium lasted for 99 years until 1995 when it was swallowed up by Macy's.  As a very indulged granddaughter it was a treat to go downtown with her and be introduced to her work friends, shop til we dropped (beginning of my clothing obsession) and then have lunch in a cafe.   There are so many great stores that are no more, perhaps I am being overly nostalgic but at that time you could go to various cities and find different stores, carrying different merchandise instead of the chain store world we find ourselves in now.

Back to sewing;  in my second Vintage Treasure Dress post, I briefly mentioned a method for finishing facings by sewing the fusible interfacing and flipping then pressing  (say that 3 times fast ! )
That tip also generated a lot of links - I am really happy to have found that tip which I believe I read in Threads magazine.  So here are some more details of this method.

First, cut out fusible interfacing for your facing pieces.   Pin with RIGHT sides together along the edge of the facing that is not sewn to the garment edge.  At this point, you will have the glue side up and be sewing on that.  Illustrated below, facing on left is pinned and ready to sew.   Facing on right is sewn and the seam just sewn is trimmed,  I trim down to about 1/4".
Vintage for N facings

Next flip facng and pin just the seam edge,  see photo below.  I then press ONLY the edge where the pins are,  to get that edge to be sealed and the interfacing to lay nice and flat.

Vintage 2piece facings4 copy
You can see that the other edge of the interfacing is a bit sloppy and hangs over the edge of the facing - at this point it is not fused down so I trim it off neatly - mostly so I don't fuse interfacing all over the ironing board cover (which is getting a cooked appearance and needs to be replaced - I even bought the silvery fabric but have yet to actually make the cover).

Lastly, now that it is neatly trimmed, I finish pressing the rest of the fusible and then admire my lovely clean edges.  This little technique has given me more satisfaction that almost anything I have learned in the past few years.  So happy when I see that nice inside finish, and so easy.

Vintage for N facings2

More tomorrow on this project.  In the meantime, to match those pretty pink flowers in the fabric, my best spring flowers in matching pink.  Some candy stripe tulips that the gopher didn't get - because they were in a big pot and not in the ground.   

pink stripe tulips

Monday, May 9, 2011

Using my feet

Last week I pulled out some vintage fabric and sewed up a little dress to give as a gift to a friend who just had a baby girl.  A new baby is always nice but a little girl sets my mind going with the ruffly and pink possibilities.
Pinkgreen baby dress


Also I made a matching diaper cover - with ruffles of course.


I used New Look 6925 which I have sewn a few times before.  I find it very satisfying to make children's clothes - no fittiing, just cut the size and go.   I had an idea for some gathered ruffles so I used my 1/4" narrow hemming foot.  I have a love/hate relationship with this gizmo, I really can never get it to work consistently.  


Edge foot


Actually, it works fine, it is me that is the trouble.  Have you used this foot?  I can be sewing along, marveling at my nice tidy little hem, feeding the fabric steadily and zing, one little milimeter is not fed into the folder area just right and the narrow hem gets messed up.  Somehow I got enough fabric to be narrow hemmed to use for the neck ruffle.


Pink green baby dr closeup


I used the gathering foot for all the ruffles - that foot is fantastically useful and gives me no trouble.    The fabric is some very soft vintage gingham that I found at a garage sale last year. I have a lot of the green and I keep thinking I will make a women's vintage style dress for my Etsy shop - one of these spare minutes.  


Here is today's SunnyGal garden photo, keeping the pink/green theme going.  Apple blossoms, which by now have all dropped and need to be swept away.  Can you spot the bee?   
Apple blossoms

Wednesday, May 4, 2011

Knit or not

After seeing so many pretty knit dresses on various blogs I figured it was time to give one a try.  I am really not a knit sewer, perhaps because I have not had a machine that did zig-zag or anything resembling a stretch stitch until just last year.  Or maybe because I have spent so much time with my nose in all the tailoring books I could get my hands on, result being I  choose some way too detailed project for the time alloted involving lapels, underlining or other such details.
A knit - hopefully easy and instant gratification, plus I fell for this fabric (ITY knit seen on line at 2 different  sources)   
NL 6429 front
So made it, wore it, and just kind of ambivalent about it.  I do like the color.  True confession time  - I just don't like sewing on knits.  They are so wiggly.  They slip all over my workspace. They don't press well.  Hand stitches kind of show.    Stop whining, Beth.  If you don't like knits then go back to your wrinkly summer cottons and itchy wools.  Hmm.  Internal debate going on here.   I may have to try something else.  When I ordered this fabric there was a remnant of another knit which I also purchased, very different and I plan another dress.  So I am not giving up yet.   I did make a Donna Karan Vogue knit dress in February for my friend JK, blogged about here, but for some reason I had very few difficulties with that fabric.
The pattern is New Look 6429 and I may be the last person in the sewing universe to make this dress - I have seen a lot of reviews on line.  Only change I made was to have a detachable sash instead of the sewn on ties.

Pattern NL6429
NL 6429 back     Back view and envelope


NL 6429 collar and front
Here is a look at the collar and front bodice,  as you can see there is no topstitching.  There had been but I picked it out as it looked very bad.  What is the secret to getting that right?   In any case I used another secret to keep that facing on the inside where it belongs.


Steam-a-seam, the cheater's method to no flip facings.
I don't use this very often, but every once in a while I think oh, yeah, grab the Steam-a-seam.  Instant double stick of some troublesome facings or other misbehaving components.  I'm not proud.  But I am happy with my smooth bodice edge.


Steam-a-Seam
On the very positive side for this dress, I realized as I finished it that it would go perfectly with a leather coat that has been languishing in my closet for a few years.  I bought this coat in Italy, near Vicenza a while ago and while it is very beautiful and soft I just never had anything I really liked to wear with it.  It is very lightweight, has some interesting welt pockets above the waist, and no collar.  For a while I had a little piece of the blue leather in my wallet as I put it there after shortening the sleeves, I think I had some idea of finding a sweater or something to match which was pretty hopeless.  Matching blues after the fact is near impossible.  I wore it with a grey cashmere sweater and wool slacks or something like that.   But now I have a coordinating piece, so the blue leather coat will give me a reason to wear this dress.

coat and dressBlue leather coat

So knits,  yeah or nay?  what should I try to conquer my issues with knits?  


First rose spring 2011


Here is today's SunnyGal Garden photo, which is the very first rose that appeared in my garden this year. Photo taken on 4/14, so by today I have many more blooming but none more beautiful.

Monday, May 2, 2011

Blogger meetup at the Balenciaga Exhibit

On Saturday I met with fellow sewing bloggers at the De Young Museum in San Francisco's Golden Gate Park to view the exhibit Balenciaga and Spain and then have some lunch and great conversation about sewing, style and fabric obsessions.  
It was so much fun to meet everyone, some were known to me through their blogs which I have been admiring for a while.  Here is our group outside the museum in the courtyard.


Museum visit1


From left to right,  Jean of j.kaoridesigns, me, Jennifer , Shams of communingwithfabric, Sydney, Rose, JillyB, and Natasha.  For those who are not writing blogs - we urged them to give it a try or at least send us a link to a flickr group so we can see more of their fantastic creations.

The exhibit was inspiring on so many levels.  I was dazzled by the construction techniques and spent a long time trying to figure out how the Balenciaga achieved the shapes  he did with fabric.   The quality of the fabrics was incredible, and considering some of the clothes were more than 60 years old, totally wearable today.  

My fellow sewers have some great photos on their blogs of the actual exhibit, here on Shams' blog, and on JillyBeJoyful Jilly has some great photos of some of the more avant-garde pieces which were interesting to see in 360 degree version at the museum.

At lunch we had a great conversation covering fabric, patterns, designers, aquisition and storage, and we hardly touched on sewing machines.  Topic for another day!

When we first met in the lobby of the museum, someone commented that they thought I was from southern California, perhaps because of my obsession with sunshine and all things summery.  
In any case - I am a San Francisco/Northern California kind of girl.   So today's SunnyGal garden photo is celebrating our Mediterranean climate here.  Photos taken at my parent's home which is nearby - no spot for an olive tree here and their olive trees are around 50 years old but still producing.  I was photographing the pear blossoms shown on the left and not until I downloaded the photos did I see the olives in the background, I like the silvery leaves in the sunshine.  Looks like we will have plenty of pears this year, and nobody really likes pears in the family - so anyone who notices gets pears later in the year :)

Pear blossoms with olive tree
Olive branch