Saturday, December 27, 2014

Plaid wool blazer jacket with velvet collar

This is the time of year when blog posts about new sewing projects get a bit thin on the ground. Not that I can blame anyone, it is a good time to step away from the sewing machine and devote oneself to all the other fun things that the holidays bring. But the day after Christmas is definitely downtime for me, perfect for a snooze on the couch or wrapping up in a blanket with a screen propped up on my lap. Time to scroll through my blog list and catch up on reading. But where are the new projects? Not so many yesterday and completely understandable. And I include myself in that group - not as many new projects this year which perhaps is a good thing.
So here is my latest project which I had thought about waiting to post until next week, but it is all finished and I have the urge to use some knits + new patterns so this will probably not be the last item sewn in 2014.

Now that it is finished I am not all that sure about it. I love the fabric, the pattern, the collar, but on the whole it leaves me less than thrilled and I can't say why.

plaid jacket front

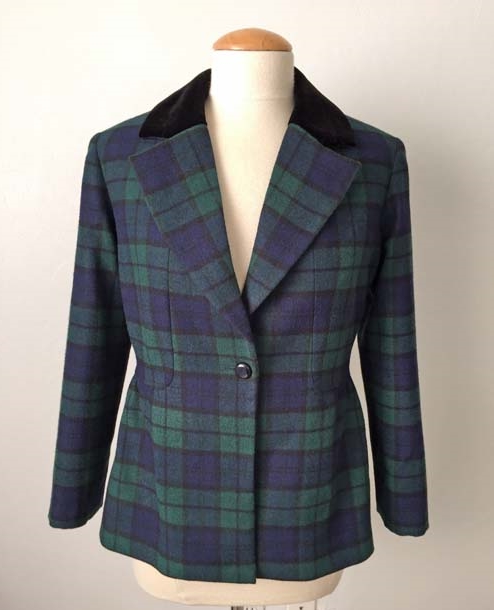
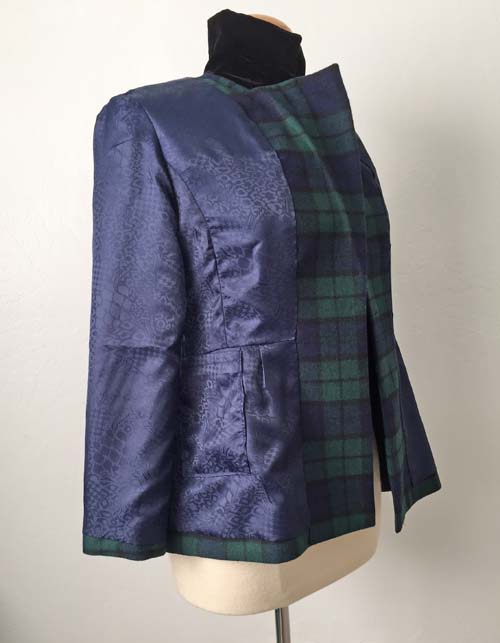
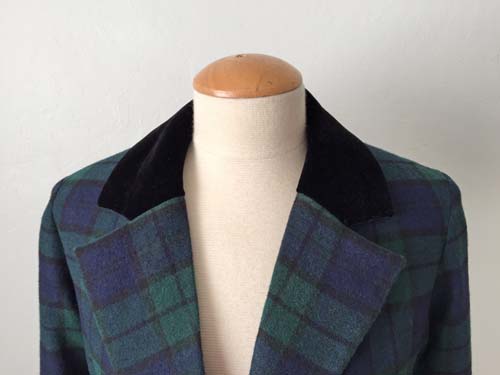
Although I do love the fabric, which I bought (where else) at the sale table at a sewing guild, for I think about 2 dollars. Is this plaid called Black Watch? Tartan enthusiasts please let me know. I might be second to no one in my admiration and desire for all of Duchess Kate's gorgeous coats, and she has worn a McQueen coat in this or a similar plaid. 
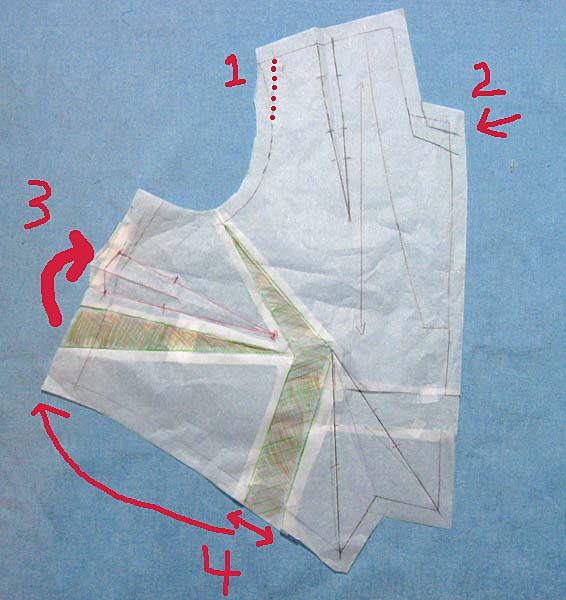
In my previous post I showed a couple of construction details, with the interfacing in the collar which is all from Fashion Sewing Supply. For the under collar I used Pro-Weft lightweight and then Pro-Sheer Elegance Medium for the upper collar/lapel. Once I had the whole jacket sewn together but for the sleeves I gave it a try on (didn't need to prior as this is version 3 for this well-fitting pattern) and I was slightly disappointed in myself for not interfacing the rest of the front. I don't know what I was thinking as I was making this, just sewing very quickly and not really paying attention except when doing the velvet collar. (Where I used my velvet needle board, see this old post for details on pressing nap fabrics such as velvet, which by the way is the same Simplicity pattern as this jacket).

Plaid jacket inside front
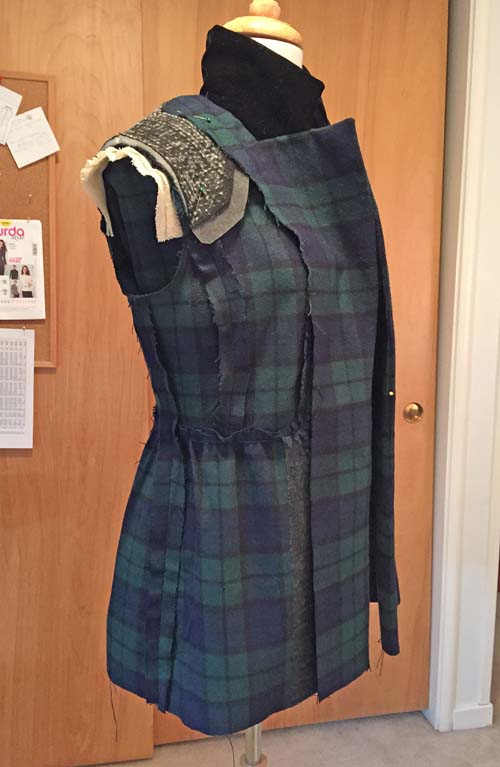
So this is me being super-picky but if I had my thinking cap on when sewing I would have interfaced that princess portion you see there partially covered by the shoulder pad. Why? because once I tried it on it sunk a little bit and made a hollow in the upper chess that I didn't like. I thought about slapping some interfacing on it but it was all sewn together so decided I could live with it. But then I rummaged through my shoulder pad drawer and found these you see above which I think are more for a man's suit than a woman's. Very wide, I had to trim and grade them near the neck edge to fit into that shoulder area but they extended down along the chest and do a perfect job to prop up the fabric in that area. They are thin, so don't really add any height at the shoulder but just do the job to support the shoulder seam. I put a sleeve head of bias lambswool sewn in by hand. The sleeves on this pattern are so easy to insert, no ripples or extra ease but they fit perfectly. Interesting, although thinking back I have not had any problems with sleeves on Simplicity patterns, perhaps that is an area where their patterns are just right. 
Here is the pattern envelope, Simplicity 2455, and based on that styling it is kind of frumpy (what else is new?). I chose this ages ago because the jacket has the hint of peplum without being too ruffly or full, plus shoulder princess seams.

2455
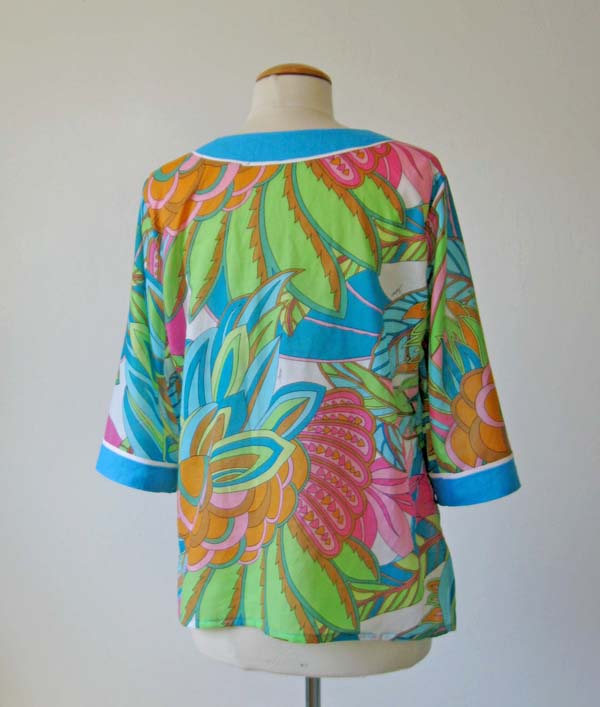
And so far I have ignored the real elephant in the room for this project, Plaid Matching! And I am quite satisfied. This pattern has the front lapel piece continuing down to the bottom and then extending out to the side seam creating the peplum portion, so the matching started in the front and then matching the front bodice pieces to the lapel. Then I continued around to the back pieces. I did do the "cut and flip" single layer method to get mirror image pieces.

plaid jacket under lapelplaidjacketback

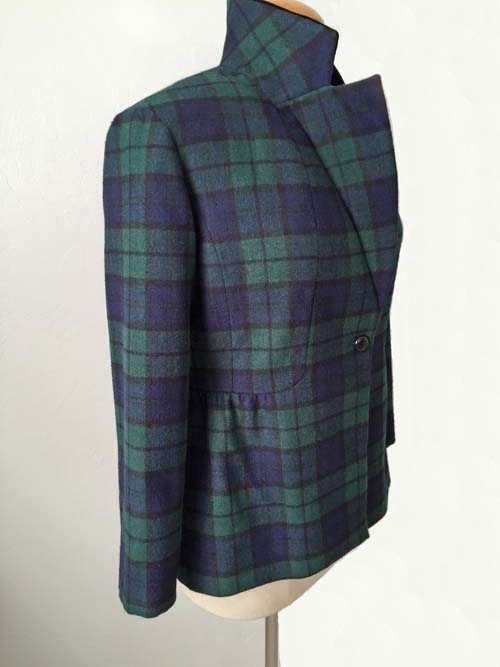
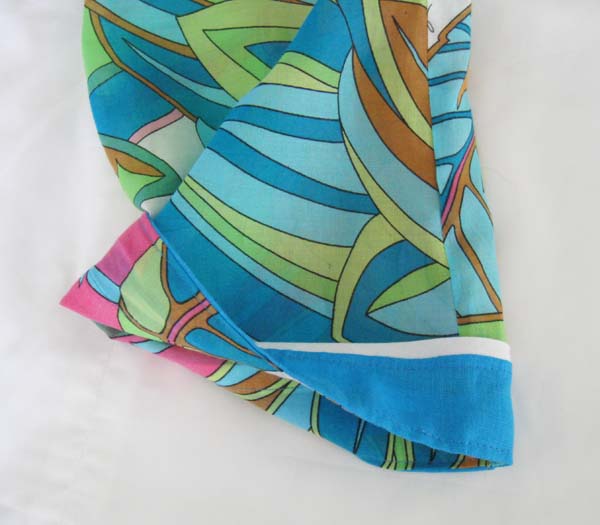
Since I was working with barely 2 yards it was a bit challenging and I cut the sleeves out last. In fact I thought I might have to piece them, maybe with a velvet cuff but thankfully  - ha - I have very short arms so there was enough fabric. Note that the sleeve doesn't match exactly at the top of the shoulder but as your eye travels down the sleeve it matches the horizontal rows across the body. That was my goal, I like a plaid that matches across the body and sometimes you have to sacrifice the top of the sleeve matching. I would love to know how Burberry does it, I have seen plaid coats that match everywhere - I suspect they design the pattern and all the ease to utilize a specific plaid and it is one system - or their special tailoring magic :)

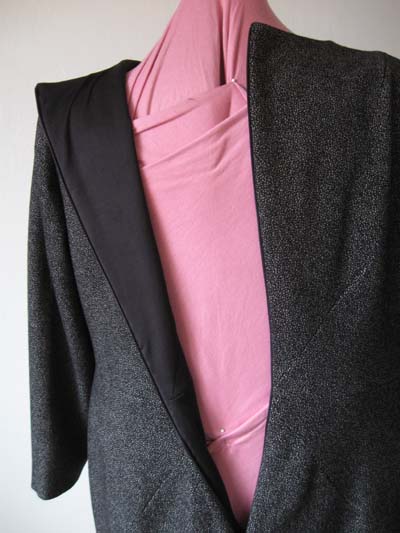
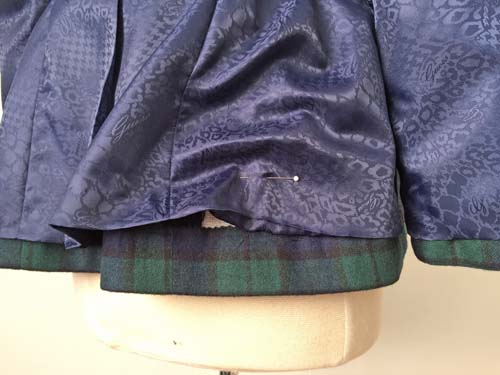
Someone mentioned in a previous comment that they like to see the insides so here you go. This lining is something I found in the upstairs sale section at Stone Mountain, it says "Guess" in the pattern so we know where that comes from. I think it is acetate which I like to use for cold weather jackets, as it is nice and slippery over sweaters and presses well. The lining is sewn in by hand and I pleated the peplum portion to reduce bulk in that waist seam. I added a patch pocket on the lining big enough to hold my slim new phone (my holiday toy). Note that I generally sew the lining in by hand because I am not a fan of the bagging a lining method and I like to tack down the lapels to the jacket front so they can't shift. Here is a link to a previous post where I show this step.

plaid jacket full lining


And the hem with interfacing along that edge (more Pro-Weft) plus a little pleat in the lining to allow for movement.

plaid jacket hem

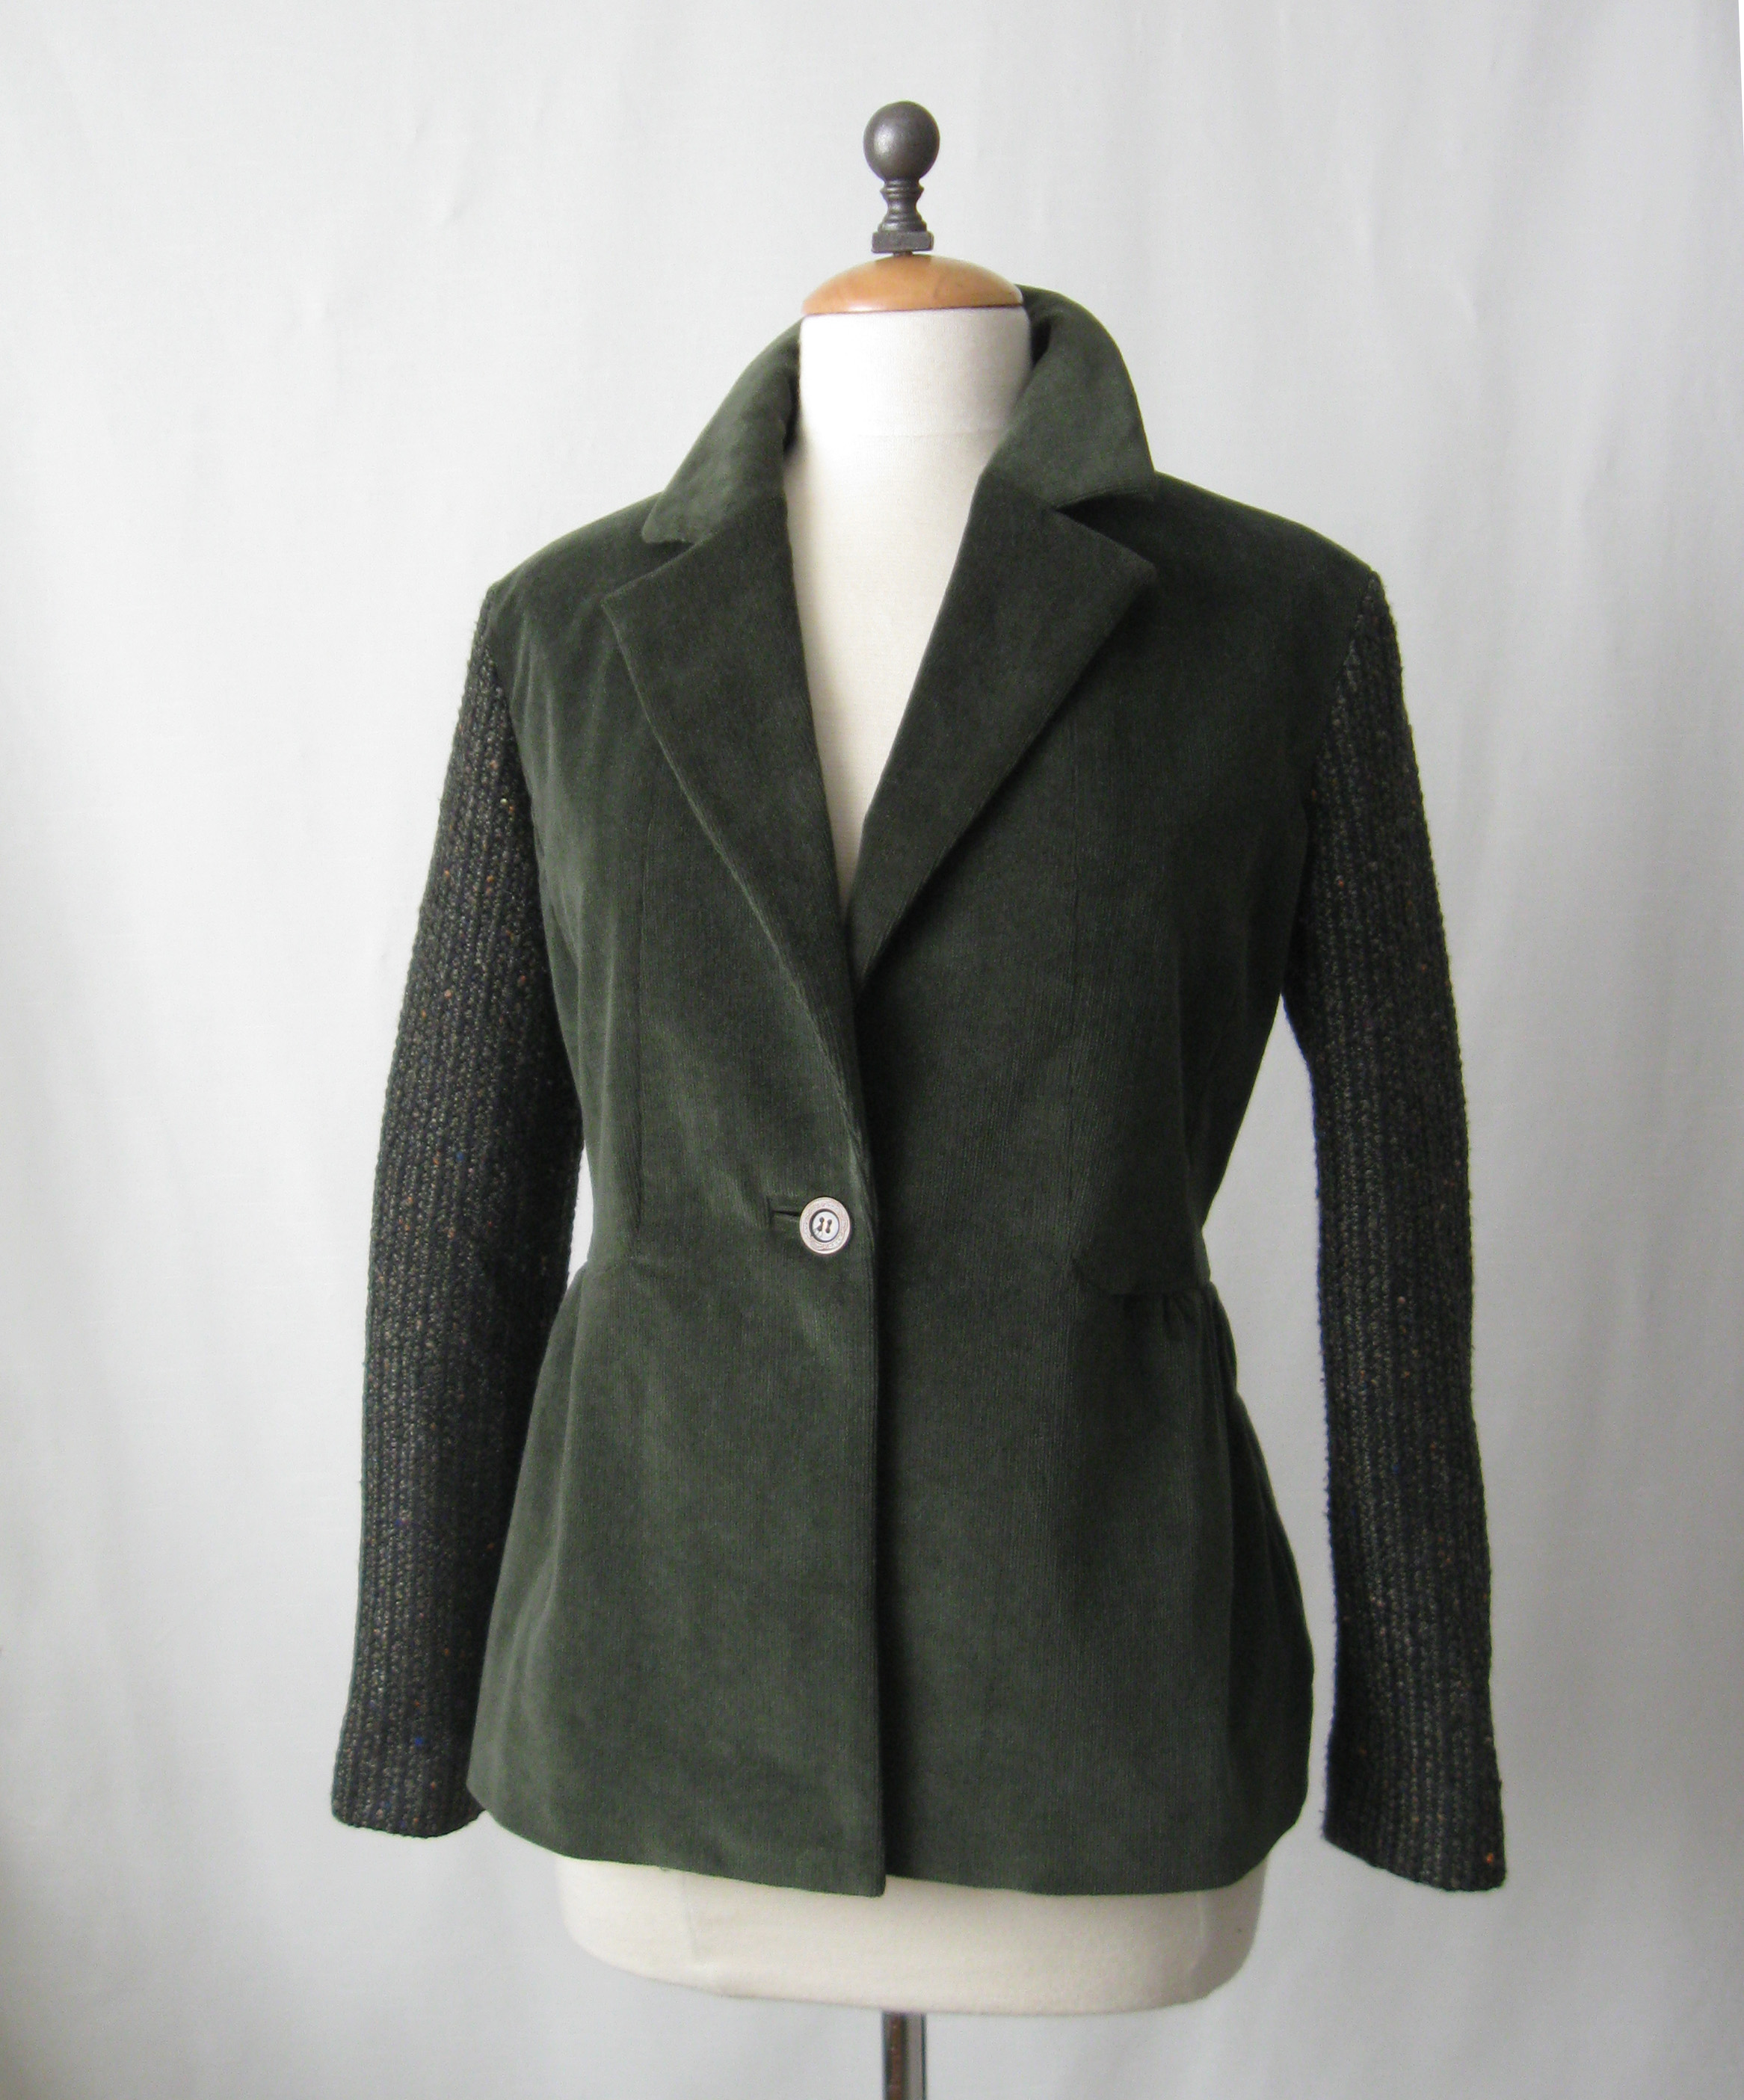
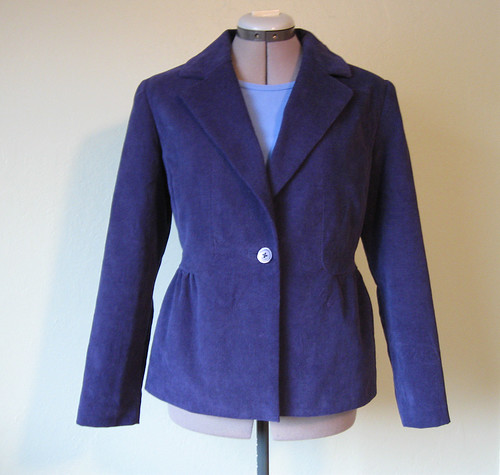
Another pattern repeat for 2014. I have made this jacket twice before and wear both versions all the time. Perhaps because they are made with slightly casual fabrics and fit well into my day to day wardrobe. Food for thought...

Link to olive green corduroy version                    Link to blue uncut corduroy version

     Olive cord jacket frontBlue cord jacket front

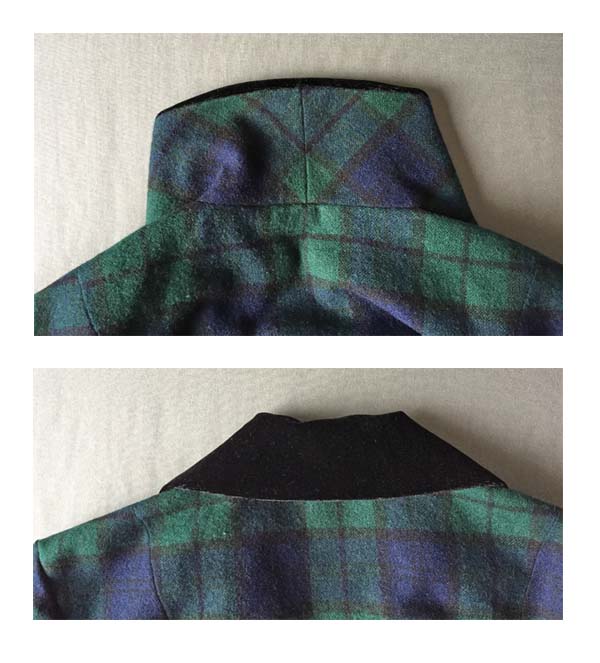
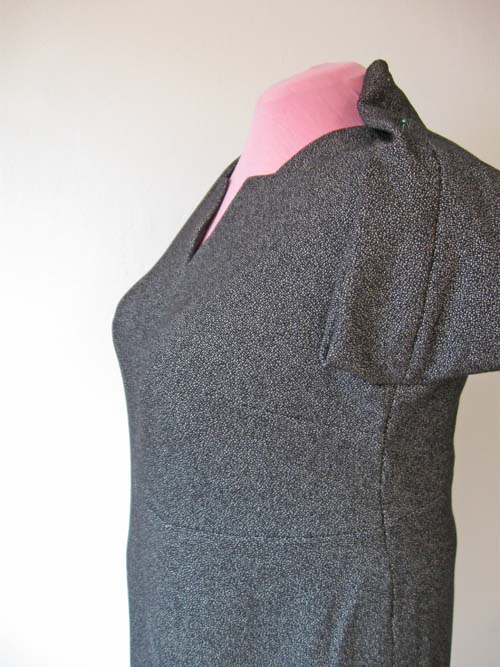
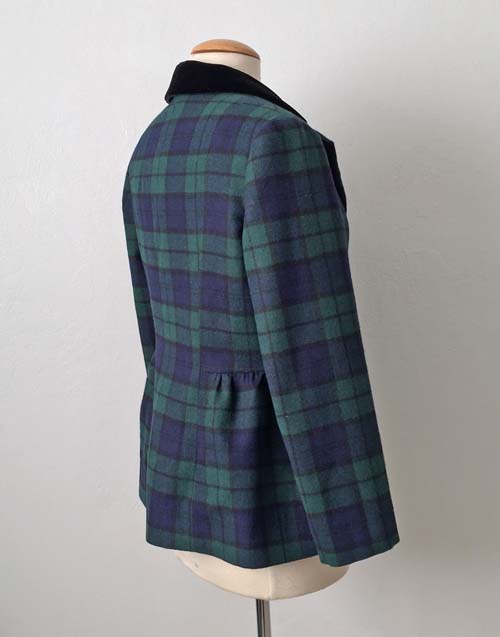
And a look at the velvet collar. Which I added not for any style or fashion choice but because wool can be itchy but velvet is not!  So a velvet collar makes this jacket more wearable and eliminates the itch factor.

plaid jacket velvet collar

So this is the last jacket of 2014. But I am sure there are more to come in 2015. If I get organized I will try to take a photo of this jacket on me and add to the post. 

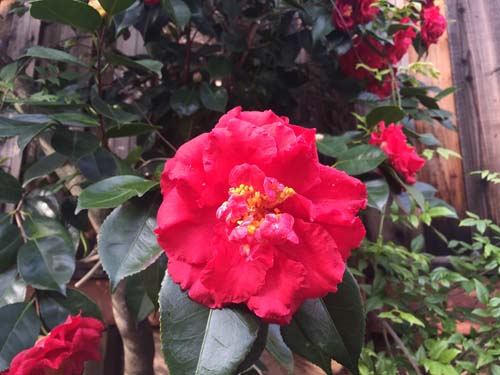
I hope everyone had a great holiday and is enjoying the long weekend. Nothing to do in the garden this week other than watch the leaves pile up and notice a few daffodils starting to peek out of the ground. 

Happy almost New Year,  Beth

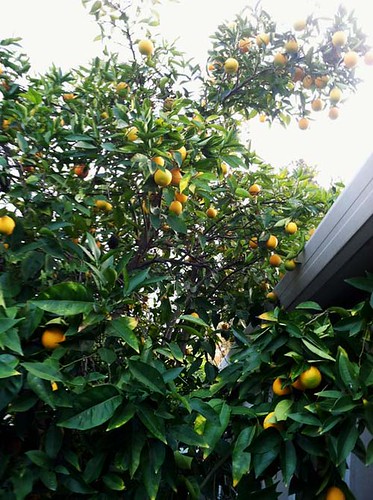
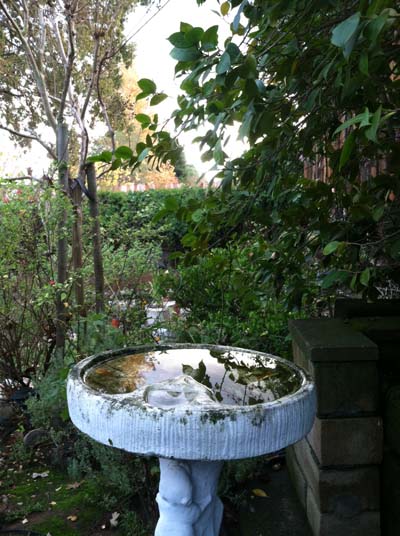
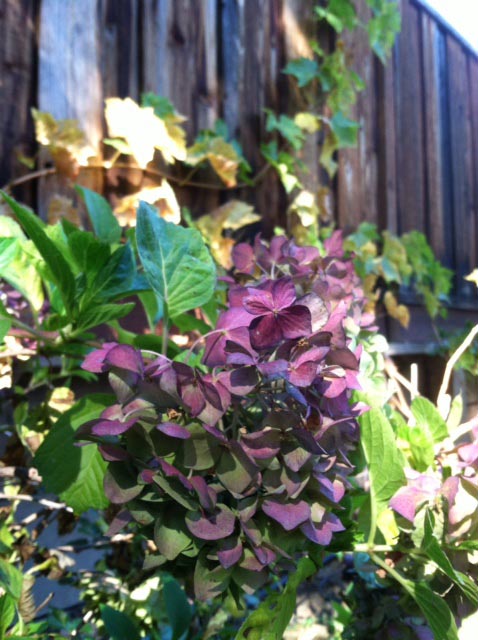
today's garden photo - the oranges are just about ripe. I was worried about a this year's crop as the drought made them look kind of forlorn but the welcome rain seems to have done wonders and they have plumped up nicely. Valencia oranges, not great for eating but just right for juice. Plus they don't have to be picked like navel oranges, so can stay on the tree all year round.


oranges

Wednesday, December 24, 2014

Holiday Greetings

The holiday sewing is finished, 
the presents are wrapped, 
the cooking is underway 
and I want to wish everyone 
a very Merry Christmas.

Tree pin

Thank you so much for reading my blog. Meeting with other sewing enthusiasts, whether in person or on-line has been the gift that the internet sewing world has provided these past few years.  
Up next will be a post on the jacket pictured above, and I plan to start the Burda coat after the holiday. 

Have a wonderful holiday !

Beth


Thursday, December 18, 2014

Pattern Whisperer creation and tailoring sneak peek

Happy Holidays and welcome to so many new readers. I noticed a whole lot of clicks the other day and then Karen's post on Tailoring Resources popped up in my blog reader. Thanks for the compliments, Karen! As it happens I have a tailoring project in the works right now with another one planned.

Holiday party season is approaching - or actually upon us and I selected Rachel of SewSouthLondon as my first Pattern Whisperer choice for some party dress pattern advice. I gave her a bit of a challenge by recommending Vogue 1342 but knew she could do it. And wow, has she ever !!! Gorgeous. I love it on her and especially love the color which looks fantastic. I won't spoil the details but just give you a sneak peek at her and urge you to pop over to her blog to see the full effect.

Rachel sample
Rachel of Sew South London in her Pattern Whisperer dress selection
If you are in the midst of party dress sewing, there are plenty of other recommendations in my post for party dresses patterns that have lots of opportunities for a good fit so check it out.

Now making a u-turn from party dresses, moving on to tailoring. In between sewing other things this December I decided to make a wool jacket. I had a piece of plaid wool flannel that just seemed very holiday-ish without being red and green so I decided to extract it from the stash and sew it up. And I thought OK, this will be a straightforward project, no fitting, using an old pattern...However, plaid !

That is guaranteed to add extra work to any project. Thankfully this is an even plaid (here is a link to some plaid tips from an old post). But I was able to sew this up fairly quickly and now it just needs the lining sewn in. 

I find the key to getting a good result on jackets is all about the interfacing. Well that, and trimming and grading, pressing, basting....ok a lot of things are needed. 
Below you can see the various interfacings used, all from Fashion Sewing Supply. Note that I have stitched down the neckline seam allowances using a catch stitch. Here is a link to an old post with some details on doing that.


plaid jacket collar interfacing

And just a hint of my pickiness on small details.  I have the sleeves basted in  (I always baste sleeves first)  and see how the shoulder seam got caught flipped back on the one on the right. I will unpick that section and restitch flat. Might seem like a small detail but it is an easy fix and if not done there might be a slight bump there that cannot be eliminated later. 

plaid jacket sleeve seams

When I was doing the collar I noticed this and thought it made the one of the best illustrations of the turn of the cloth that I have done. Collars are three-dimensional (duh, all clothes are but you know what I mean) Collars don't lie flat on jackets, they rise up from the neck and fold over toward the jacket back. So the upper collar needs to be longer than the under collar and that difference needs to be maintained when sewn but even more importantly when pressed.

Turn of the cloth3
That's all for this jacket now, I hope to finish it by this weekend and start wearing right away. Under my rain jacket when out and about - as it is raining a lot. This is our holiday gift for California this year :)

Happy almost Christmas sewing,  Beth

Here is today's garden photo - the bright red camellia blooming just in time for the holidays. These blooms are so big and are adding a nice spot of color to the otherwise drab winter garden.

camelia red 2014

Sunday, December 14, 2014

Sew a child's apron - new post on the Craftsy Blog

Are you making progress on your holiday sewing? I am giving myself a break this year - sewing very few holiday gifts this year which certainly takes the pressure off. I have ordered so many things online, such a civilized way to shop! Everything comes full circle. Somehow ordering via the web and having packages delivered by the cute UPS guy makes me think of history lessons we learned in school here in the west. Is this is the 21st century version of that iconic Wells Fargo stagecoach bringing goods to our pioneer forefathers (and mothers) living in isolated towns, waiting impatiently for their shipment of muslin and calico, needles and thread? Not to mention Christmas trees - if you believe what you see in Hollywood movies or TV commercials.

I digress - back to holiday sewing. I have a new post up today on the Craftsy blog, with a quick step-by-step photo tutorial on how to make a child's chef apron. And my neighbors proved to be great models :)


Apron blog post

In other sewing news, I have started another blazer jacket (I know - how many jackets can one person wear). I had a piece of fabric that was just begging to be sewn up for the holiday/winter season so I plan to finish that today. Wool + Plaid + velvet = I will wear it immediately.
Thanks for all the great comments on the Burda dress. It does look great on her. Bonus, I have a small remnant of fabric remaining which might become a V1247 skirt for me.

OK - back to the sewing machine! with a detour later to plant more bulbs. A little late in the season but I went into the garden center to buy a gift for someone else and came out with that plus some half off bulbs. I am helpless in the face of discounted plants. pathetic !

Happy Holiday Sewing, Beth

Wednesday, December 10, 2014

Burda plus 11/2013 #113B - sew this dress now !

Every once in a while I come across a pattern that I think is just perfection and this is one of them. Not to say that it didn't need a bit of fitting adjustment which is normal but the shape, the style, the simplicity and the details are in my opinion, fantastic! This was one of my Pattern Whisperer picks for really good daytime or work dresses and now that I have sewn it up I think so even more. (Plus the model looks so glam in her sunglasses).  This one is Burda Plus #113B 11/2013.

Burda plus 113B

I showed this pattern to my friend and sewing client Heather and she instantly said yes, so we added this one to our list of items to find fabric for on a recent trip to Britex. She wanted a few dresses that would work for winter, be right for office wear and warm also. I found the fabric among the wool knits and I am not really sure what you would categorize it, maybe a sweater knit? I want to call it marled but my yarn knowledge is nonexistent. Kind of a black white grey blend and nicely stretchy but substantial.

Here she is modeling the dress. Apologies for a not very good photo - she came by to pick it up very late on a grey day so the light is not ideal. I have so much trouble finding a good spot to take indoor photos. Anyway - I think it looks great on her, the darts give nice shaping and I really like the neckline that adds a nice bit of interest.

Burda plus 113B Grey Sweater dress

OK, some details and better photos. Here it is on the form (and obviously one of those items that looks so much better on a real body than the dress form.) I lightened up the photo a bit so you can see the dart detail.


Burda plus 113B front darts

I mentioned in a post a few weeks ago that I was sewing up this pattern and had added an additional horizontal bust dart so here are the details. This is the front bodice pattern piece before adjustments, note it has a center seam, a large dart which starts from the bottom inside edge, and then a small shoulder dart. I played around with it on the dress form as well as doing comparison by flat pattern measure and decided to do a bit of a full bust adjustment and add another dart to increase the "three-dimensionality" of the bust area.

Burda plus 113B bodice front original

So here is the adjusted pattern piece.  Below are listed the changes made which are noted by my scribbly red numerals.

Burda plus 113B bodice front adjusted

  1. Moved the outside edge of the shoulder seam in about 1/2 inch as she is rather narrow in the shoulders as compared to bust measurement. (same slight adjustment on bodice back)
  2. Lowered the front neckline about 1/2 inch as it was proportionally too high for her height.
  3. I should have numbered these in reverse, as I did # 4 first. I drew a line sort of parallel to the center edge up to the tip of the big center dart, and then continued to the armhole. I cut a slice from the side seam to the tip of the dart, as if there was a horizontal bust dart there and then spread the whole thing in typical FBA fashion until I had added the amount I wanted, about 1 1/4 inches. So now I had a dart on the side seam but I didn't like the placement and angle of it, so I measured the amount, and then drew it up higher and at a more pleasing angle. Also note the tip of that dart stays well away from the big waist dart. No need to connect the dots there - that would not be a good look !   Lastly I added the additional width added in the center waist to the outside edge of the skirt front. 
Once I had made these adjustments the front shaped really well and I think the side dart makes a good change on this pattern if the wearer is very full busted. Here is a look at the bodice, hard to see that dart but that is a good thing - it is doing its job but is not a prominent feature.


              Burda plus 113B side view 2Burda plus 113B side view


Other adjustments: I had to shorten the back bodice by a good 1.5 inches in the center tapering out to the side seams. It is hard to know just where the skirt should be on someone else, so for her I always baste it on but then adjust on the body. I did a slight bicep adjustment on the sleeve but the real adjustment was to shape the side seams so that the dress fit in a curve hugging way at the waist. The only way to do that is just try it on and pin+baste, and continue until the fit is just right. I like how this dress is slightly pegged at the hem.
I did a full lining using a knit fabric. My solution for lining these knit dresses is to use a poly knit which is usually in the dance wear or active wear section at Joann fabrics. The back has the same diagonal dart detail as the front.

Burda back lining

All in all, a very flattering silhouette with the darts and neckline to make it different from the standard sheath dress. I think it will work well for spring/summer in a print and with short sleeves, and I could even picture it as a two-color version with a solid bottom and maybe a print on top to give a blouse/skirt effect. I even suggested it could be a knit top as well.

Pattern satisfaction ! In a few weeks I will do my year end analysis and this one is definitely in the top tier of pattern for 2014.

In other news, after all our worrying about the drought we are poised for a tropical storm tonight and for the next few days, with up to 10 inches of rain in some areas. So yay for us! My garden (and the farm economy of our state) will hopefully recover. Plenty of sewing plans this weekend, hoping to get back to that Burda coat and I think I will sneak one more wool blazer in before the end of the year. A few Christmas gifts to be sewn, and who knows what else will distract me before the year is over.

Happy December sewing,  Beth

And here is my garden photo which I took last week, a sight I have not seen in a while. While the birdbath needs a good scrubbing, the birds don't care as I am sure they are happy to have it filled with rain.

birdbath

Monday, December 1, 2014

The Goldilocks top - a self designed Tunic top in cotton voile

For the longest time I have wanted a lightweight tunic top in my wardrobe, but somehow never got around to making one. Like Goldilocks every fabric was too heavy, too thin, the wrong color or some other issue. Also I am not a fan of woven tops, I have a few button front shirts but otherwise mostly wear knit top or t-shirts when I am dressing in separates. But there is something about the classic tunic top that appeals to me, very beachy and relaxed.

It just needed the perfect fabric which I found on Gorgeous Fabrics earlier this year. (to my surprise it appears they still have some). It is a cotton voile from Milly, which is one of my favorite NY designers. Someone recently said to me that all the items that I sew are "so you". Which is a little bit indefinable but I know what they were getting at. I think that is a big part of sewing success, at least for me. Sticking to things that I know appeal to me in either color, shape or fabrication means a better chance of liking the finished garment.

Here is my finished tunic top which I made by adapting a basic shirt pattern into the tunic shape and then designing the placket. There was a slight ulterior motive in this as I wanted to write a post for Craftsy on designing and sewing a tunic top using a basic shirt pattern.

TUnic top on form

I am sure for some this fabric might seem a bit wild but I love it, the color combination is definitely "so me". And it is the lightest, most comfortable cotton voile which feels lovely to wear.

Sorry this picture is a bit blurry, my camera is driving me crazy and getting my family to take blog pics when on vacation is not high on their agenda :)  Also overexposed? or the light was fading a bit so the color of the top is off. The view above on the dress form is more accurate.

Tunic top on me2

The placket is a lightweight 100% linen, with some fusible knit interfacing to give it a bit of shape at the seams. I played around with it a bit and then decided it need the punctuation of white piping against the turquoise placket. I didn't have any piping so just used some white bias tape which works well as piping on something like this. 

Tunic top close up


The post on Craftsy has what I think is my ultimate tip on pressing and shaping the neckline placket - so take a look over there for lots of details! I would post the construction details here but I am swamped with projects so for the sake of time will just refer to that Craftsy post. Also there will be a part 2 so I will edit here to include that link. The Part 2 post has my method for creating the clean finish neckline with no facings which is certainly not original but hopefully a good explanation.
Edit 12/1/14:  Here is the link to the Part 2 post on sewing the top.


Tunic top inside sleeve


Tunic top back

Oh how I love this fabric. That makes 2 items sewn with cotton voile this year that have turned out to be favorites, the other one was this Vogue 1353. There is something about cotton voile that is just so breezy and floaty, it feels delicious but you have to choose the right style to take advantage of its qualities. 

I am in serious sewing mode trying to finish a bunch of things that need to get done here in early December. I finished a dress I mentioned in my last post, the Burda 11/2013 #113B dress with the interesting diagonal darts and that dress is a WINNER! Fantastic pattern and I will give you a look plus some details on a few adjustments including adding another bust dart for shaping. 

Whew I can't believe Thanksgiving has come and gone. In between other stuff this weekend I did plenty of on-line holiday gift shopping. Hoping to do it all that way but not likely. And it is just as difficult to avoid the "one for them and something for me" syndrome when shopping on-line as it is in the stores!

Happy December Sewing, Beth


Here is the hydrangea in the back corner of the garden, where I take most of my photos in the summertime. By now it has faded to a lovely autumn shade of purple, to complement the grape leaves turning gold that trail behind it and up the fence.

autumn hydrangea