Friday, February 27, 2015

Button sewing, more that meets the eye

Hi and Happy Friday. Thank you so much for all the nice comments on the Quart coat, I really appreciate it. It probably goes to show that I really like making tailored wool items. I am about 3/4 of the way through making the Burda coat which I mentioned way back in November, the pattern is Shawl Collar Coat 11/2014 # 111 however mine is turning out to be more of a jacket than a coat. Which is probably just as well as a jacket is more wearable for me. 

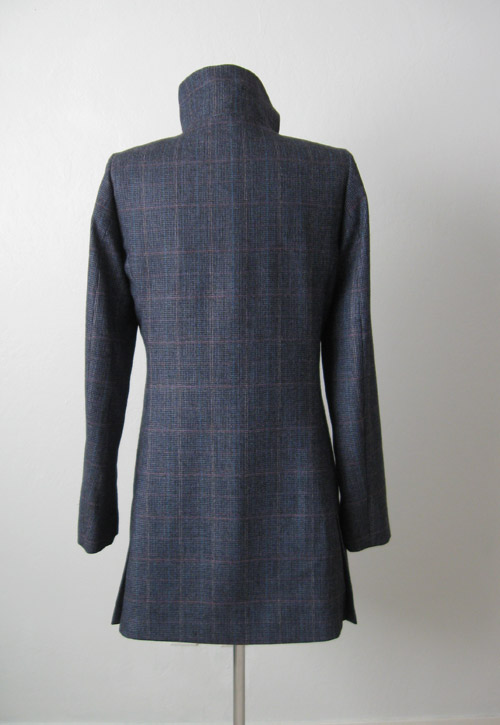
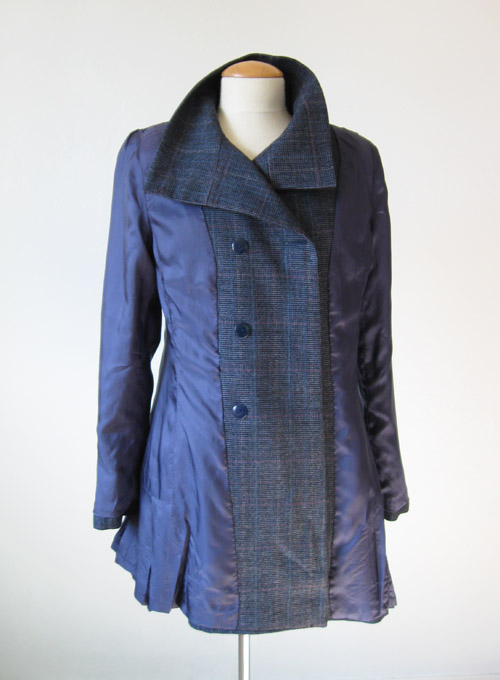
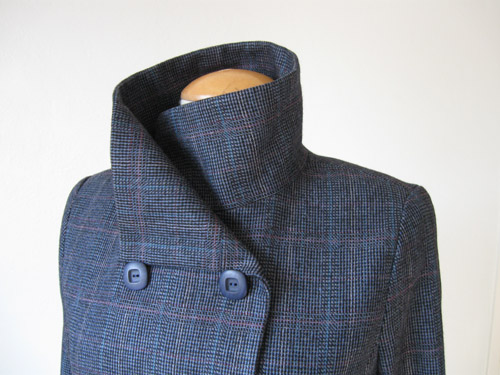
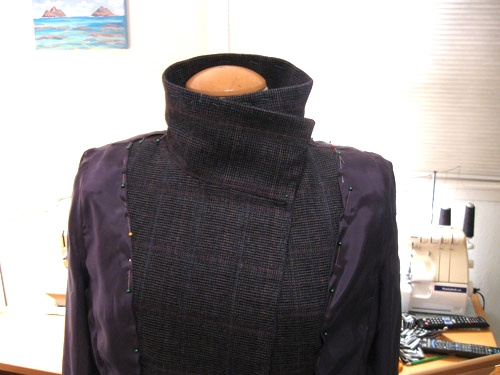
How about buttons? That Quart Coat has 8 buttons, it is a double breasted coat and I made 4 working buttonholes on the outside plus one on the inner side so that it would stay closed if buttoned up all the way. When I was sewing on the buttons I had some issues and thought it might be interesting to see. 
Here it is all buttoned up, and the two extra buttons. I always buy two extra buttons for something really nice, it would be so annoying to lose one and have to replace all of them. Plus a coat is the garment most likely to lose a button, at least in my experience. 

finished all buttons

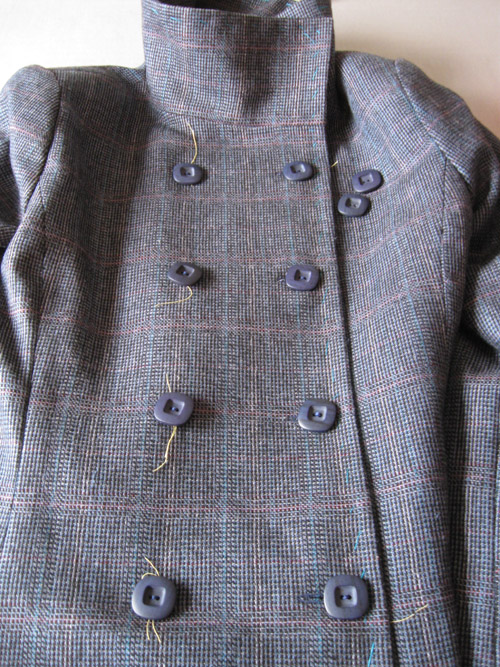
Note these buttons only have 2 holes. I find that this type of button is slightly more troublesome to sew on and have it stay in the orientation. As you can see these are square - they go nicely with the plaid but wanted to turn and twist after being sewn.
Why? because buttons are tricky. Kind of like Goldilocks, you can sew them too tight, or too loose, or just right.
I sewed these buttons on so many times I lost count. I am kind of fanatical about button sewing, and yet I really dislike it. But if sewed in the wrong place - even by a few millimeters it just ruins the front of the coat.

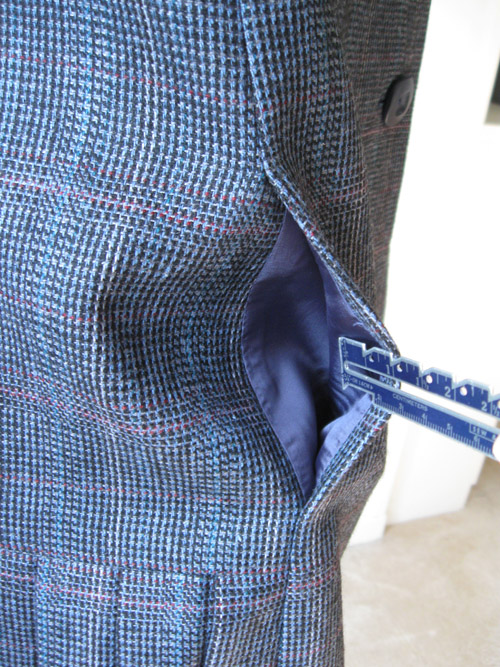
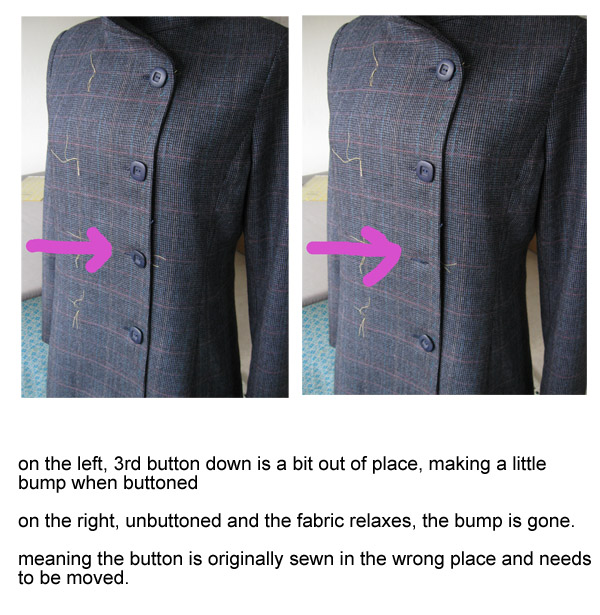
Probably hard to see but here is the example. When a button is sewn just slightly in the wrong place it can create a bump or ripple, or can offset the whole row of buttons and have the front be crooked. In this case I worked my way from the top down, sewed them all, and checked each time that they were OK. I thought they were fine but the one indicated there is a troublemaker.

button comparison edit

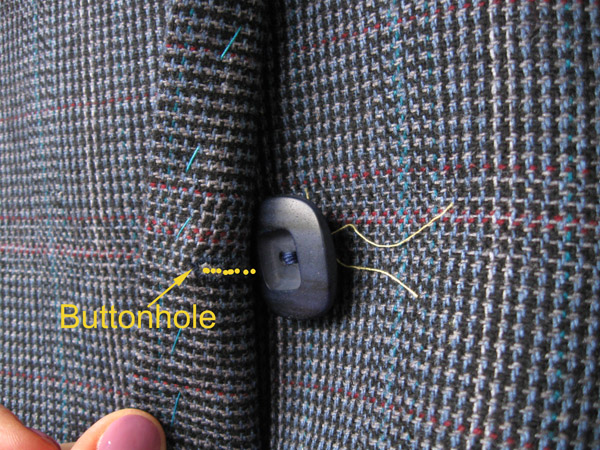
Here is a super closeup view of the button and buttonhole. I put the yellow dots so you can see the actual buttonhole opening. So even though the button is not too tight on the garment, meaning it has a little thread shank of about 1/8 - 1/4" it still was not in the right place. I think I sewed it on once more and then had to adjust another one as well.

buttonblip closeup edited

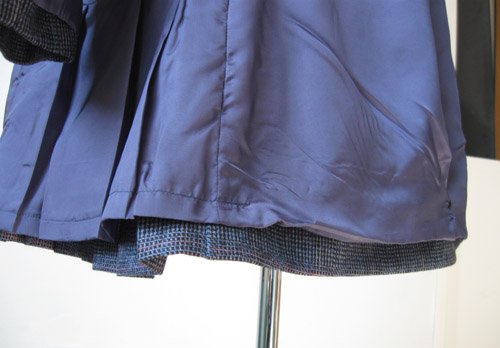
Whew! finally got them all in place although as you can see in the first photo it is a bit of a conflict because if they are sewed very tight so that the plaid lines up exactly then they would make a pucker at each buttonhole. Sewing buttons too tight causes just as many issues as sewing in not the exact right place. No wonder I dislike sewing buttons, my least favorite thing!

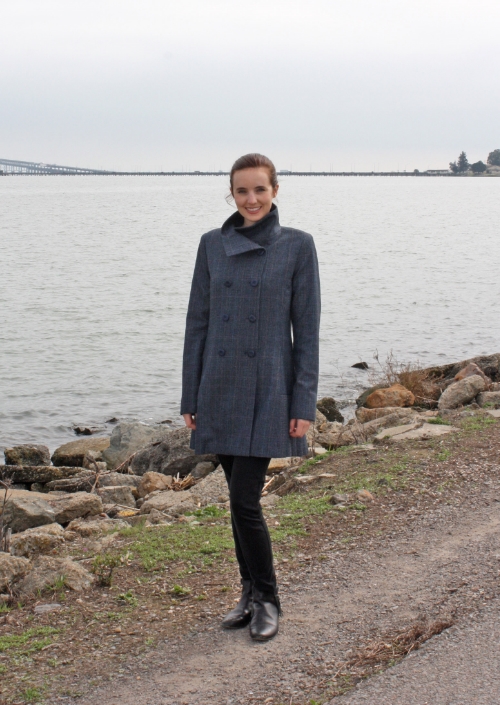
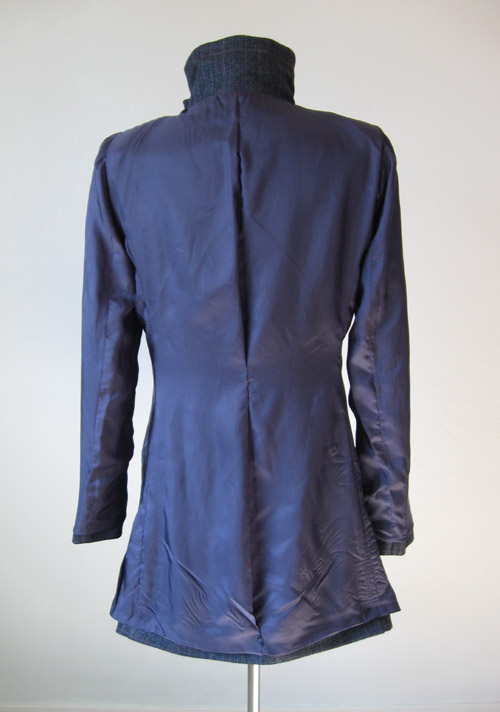
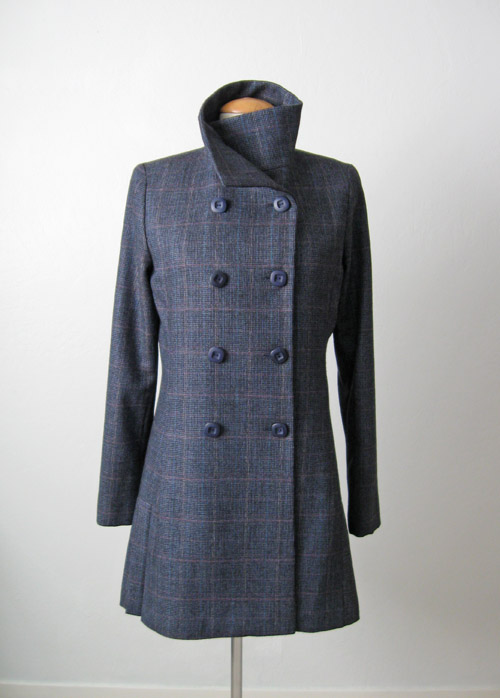
All's well that ends well, and I think these buttons are just perfect. Stone Mountain fabric store in Berkeley to the rescue once again.  Here is the finished coat although better views in my previous post.

front buttoned collar up copy

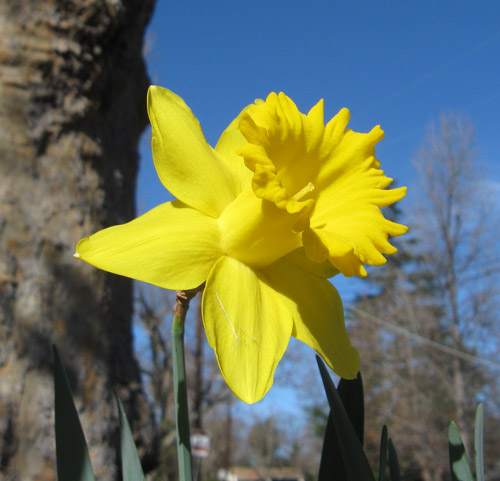
Spring is just around the corner here - or actually here, a bit early with daffodils in full bloom and tulips getting ready. I read all the snow zone blog posts with sympathy (horror) and know I would not last more than a minute any further north than, let's say, the Napa valley. Ok slight joke but I can't take winter. Hope it warms up for all of you very soon.

Happy weekend sewing, Beth

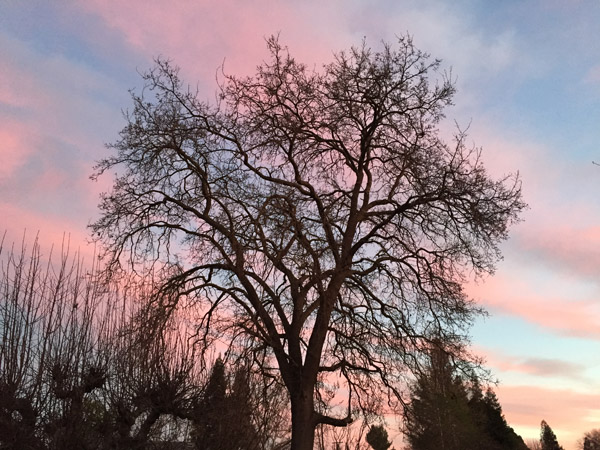
The last week or so has had the most amazing sunsets, the other day I was driving home from Marin and the sky looking out over the water towards the Golden Gate bridge was the most gorgeous shade of pink and gold. It does seem like living in a postcard sometimes as I travel around the bay area.
Behind my garden is a beautiful old California oak tree, three times as tall as my very large apple tree and home to an amazing number of birds and squirrels. Live nature entertainment just outside the sewing room window!

Oak tree at dusk

Friday, February 20, 2015

Quart coat completed! Pauline Alice coat pattern

The Quart coat is done. There is something very satisfying about this pattern title, I have to ask the designer Pauline Alice where she got the name. An almost alliterative name to say out loud and a very pleasing pattern to sew. I'm just wild for the pleats although I do think that fabric choice can make or break the coat, it needs to be something that will press nicely. I will have a follow up post on buttons and buttonholes but here are the final project pictures and the coat as worn.

This is Jaime wearing her new coat. Lots of photos in this post but I think this coat is worth it!

Jaime 1 copy front buttoned collar up copy

Whew, that plaid + double breasted + pleats, I will admit that fully half the work was just cutting it out. And it is a subtle plaid, but it needs to match. This wool was really a perfect texture, a wool flannel but just a tiny bit more crisp than the usual wool so it pressed perfectly. This was actually a lucky break for me. I happened to have two fabrics that would have worked, one was this and the other was more of a tweed, mixture of tan, lavender, grey. Slightly dull. In retrospect I think she chose the better one but at the time I was hoping she would select the tweed, because...not plaid!

pleats close up copy

Jaime2 coat

coat back copy

Ok, lots of readers like the inside view so I made sure to flip the coat inside out. I omitted the back neck facing and cut the lining so it went all the way up to the bottom of the collar.  You can't see it here on the navy blue lining but is another post for a Burda coat I made in 2013 that shows this lining change.

inside lining frontlining back copy

A couple more details. Someone asked in the previous post about the lining hem and the pleated section. I confess I didn't read the instruction so not sure how it was supposed to go but I just cut a piece of lining, about 3/4 of the length of the pattern piece and then just hand pleated it at the seam to fit it in that section. I machine stitched the lining hem just in that section, then the rest of the lining is hand sewn to the hem with a little jump pleat to allow for movement.

hem lining copy

Pockets, of course. Same lining fabric which is Ambience rayon. I think pocket linings should disappear, and usually I cut a little extension on the coat body so that it sticks into the pocket further but I forgot. But these pockets are on the front princess seams and they hide well.

pocket lining copy

I had my doubts about this collar but now that I have finished it I really like it - lots of ways to style it.

collar close up copy

I could not be happier with the combo of coat, style and wearer. I think she is too :)

Jaime smile

We took these pictures in Marin on the bayshore - it looks cloudy but just a little fog. No rain for us, unfortunately.

I did two previous posts that included this coat, the first is here, just a sneak peek really of the inside and my extremely zealous tailor tacking, and the second post is here, with some details on construction. Pauline contacted me last summer and asked if I would try out her pattern which was still in the design stage, she sent me some photos and I said a resounding yes. Then I was swamped with other stuff, made a muslin, gave her feedback and decided I would not sew it as I don't care for double breasted all that much on me, and though it was not really a coat nor a jacket because of the length. Then I thought about changing it to single breasted - which could easily be done and it would look just as cute. Also thought about lengthening. However when I showed it to Jaime she wanted it exactly as designed, and I think she was absolutely right. (of course she is 5'8" and everything looks good on her :) A pattern with a lot of possibilities, probably not a beginner project but definitely a nice challenge.

Onward to my next project, I am still pondering the Burda coat, and thinking it might be jacket length instead - how many coats do I need?

Happy sewing, Beth

Thursday, February 12, 2015

Fitting Examples and Vertical Adjustment

Real life examples of fitting issues and the subsequent pattern adjustments which I make have always generated lots of interest and comments.  Today's post on the Craftsy blog is all about the vertical adjustments in pattern fitting. I had asked Craftsy recently which topics they wanted me to write about and my editor said that their number one request was for more information on plus-size fitting. Interesting, huh? I chose a fitting issue that anyone with a curvy figure will have encountered, let's call it the wayward waist seam.

This post is one I am particularly proud of - hopefully I have included some useful information that will be pertinent to anyone across all sizes who is doing pattern fitting. Which is probably all of us. If you have ever had a dress where the waist crept upwards or a horizontal seam that unintentionally bisected the bustline then you will want to read this post.

Of course fitting, for whatever shape or size is really the key to feeling great about clothes you make. Writing this post allowed me to talk my own personal fitting obsession which is bodice length.

I hope you find the post useful - I would love to know your thoughts so pop back here and leave me a comment.
Craftsy image vertical adjustment post

As for the pattern I used which is shown in the post (and looking downright odd in the before and after examples), it is Butterick 5764 which I have had for ages and finally used to make a maxi dress for a client in flowy rayon which was ideal. Not the most appealing pattern as they have depicted it but I really liked the shoulder release darts and the cross-over front.
Butterick 5764 pattern envelope
Here is the tech drawing which looks a lot more promising :)

Butterick  5764 tech drawing

If you want to see that pattern sewn up here it is. I put this photo on the Craftsy post but over there it is cropped and a bit edited - here is my actual house complete with messy shelf filled with too many pattern envelopes and stuff hanging on the door to be ironed. And the Burda coat muslin sitting there taunting me, as yet unmade other than the test version. I should make a note to review this pattern, I think it make a great floaty maxi dress for summer.

Maxi dress copy

Almost done with the Quart coat - 100% due to fabric choice I really love and now I want a plaid coat. Which I will not permit myself to have, at least not this year, it was 74 degrees F here today. I had shorts on when I went to the gym. Crazy! No coats for me!

Happy sewing and fitting, Beth

Wednesday, February 4, 2015

Quart coat progress and some thoughts on technique

Every once in a while I make something and say to myself - this is one of the best things I have ever made! Which due to my (perhaps) excessive self-confidence I say kind of often. But it means that I am happy with the things I make, so that is nice.  I am making the Quart coat from Pauline Alice patterns for a friend of mine and I told her yesterday that if this was my size I would be keeping it. OK, just joking but I am really liking how this is looking. Probably due to the fabric choice. Plus the pattern is adorable.

Just a reminder, here is the pattern and the fabric I am using.  This image is a bit dark, the fabric is a blue grey plaid with threads of teal and wine red in the plaid.

quart pattern and fabric

Those pleats are so cute. I think it gives this coat some movement, and are something I have never seen on a pattern before, although it is a detail that I have seen on some McQueen coats in the last few years. Tailor's tacks are my method of choice for pattern marking, and I always leave them in until the garment is about done, particularly in case I need to press again. Also with pleats after making I baste them shut for the duration of the construction, helps them stay put.

Quart coat pleats

Previous comments indicate that there is a lot of interest in seeing the insides of garments, construction and how things look before being hidden by the lining. So here you go.  Perhaps not easy to see but this pattern calls for lots of interfacing which I completely agree with. I do use a mix and match approach to interfacings, combo of weft fusible and knit interfacing. Shoulder pads and sleeve headers are done so the last step with the exception of buttonholes and hem is to add the lining.

Quart coat inside view

Now for my thoughts - here is something I just don't get:  bagging the lining. I have done it exactly one time and hated the result! To me it doesn't compare to a hand sewn in lining. I know that a lot of people hate hand sewing but I really like it and it is the only way I know of to get the collar, facings, etc to stay put invisibly instead of wiggling and migrating when you are wearing the item.

If you are interested in these techniques I did a series last summer on tailoring a blazer, and all the steps appear there.  Here is the first post in that series.

I attach the upper collar to the under collar with silk thread. I suppose I could sew in the lining and then do this step but it would take a lot of wrestling of layers. Actually I have done that and didn't like it, just simpler for me to work with the layers in order, lining last.  The front facings are also hand stitched to the front of the jacket so they will not move.

inside collar Quart coat

Then I sew up the lining and press the edge.

lining Quart coat

To add the lining I usually turn the coat or jacket inside out on the dress form and pin it in place, then hand sew it to the facings. This photo was a bit dark so I lightened it enough to make the pinning visible.  Another thing I did on this coat - which I do all the time, is skip using the lining pattern pieces that come with the pattern. I just use the garment pieces, add a pleat in center back and hand draw the edge of the front pieces.


quart coat lining pinned in

I am nearing the finish line with this one.  I found these lovely buttons at Stone Mountain and they pick up the blue in the fabric but are not overly shiny. My friend Laura Mae told me about a button shop last week which she posted about.  I sort of can't believe I have never been there or even heard of it as it sounds like fun to visit but I have such good luck at Stone Mountain that I will probably stick with them and their lovely wall of buttons.

Quart coat button choice

That is the progress on this coat. Which I want to finish by this weekend as that Burda coat idea is still in mind and I want to make that before summer arrives - which could be soon because it was around 80 degrees F in some parts of the bay area this week. Global warming, eek! I love summer but this is getting strange.  Apologies to all of you shivering in other parts of the continent!

The other thing that occurred to me this week, in the category of things that I just don't get is Colette patterns. They are popular but to my eye not very original and so far my experience has been that the fit is strange and needs a lot of adjustment. Also their examples shown never appeal to me, partly the color/fabric chosen and partly the examples don't look all that well done in fit or finish. But as I have said before I probably don't fall into the category that is their target market so just like the new Vogue pattern release, there is something for everyone out there. If you love them and they work out for you that is great. The only one I ever thought about buying for maybe 2 seconds was the Lily dress pattern, except that I might have at least 3 different patterns that I could adapt to get the same result. And I don't need any new dress patterns. Or old dress patterns for that matter.

I have a new post up today on the Craftsy sewing blog on How to make a box shaped pillow cover. The type you might use to cover a bench seat or foam cushion. So if you are in the home dec sewing mode take a look. Someone wrote on the Facebook comments that it was too complicated, and that made me laugh - as it is slightly complicated to calculate the measurements on that type of pillow, not rocket science but I did add an equation. How else can you do it? Math and sewing, people, they go hand in hand :)

Happy Winter sewing, Beth

Here it is, the first daffodil in the garden. Enjoy!

Daffodill 0215